 Repair parts iPhone XR

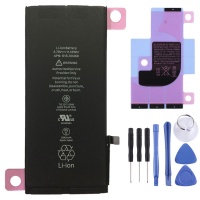
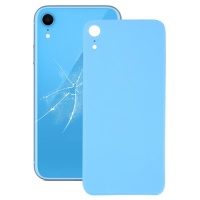
Receive it on tuesday 10 de june
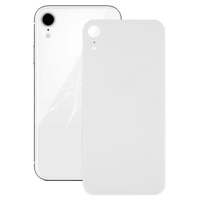
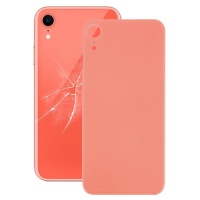
Receive it on tuesday 10 de june
Receive it on tuesday 10 de june
Receive it on tuesday 10 de june
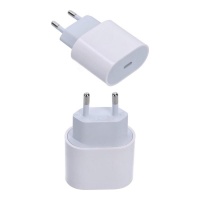
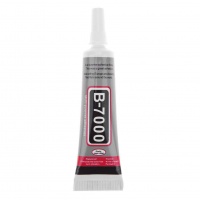
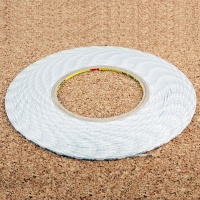
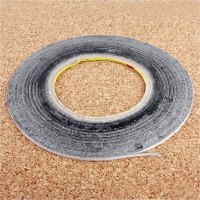
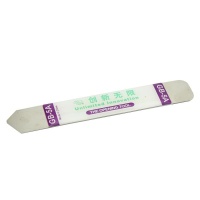
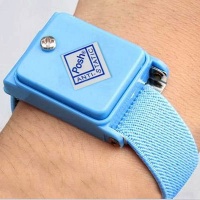
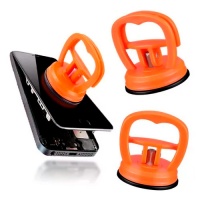
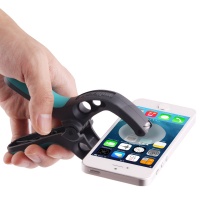
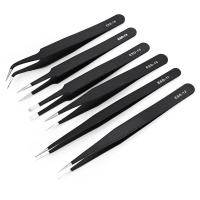
Receive it on tuesday 10 de june
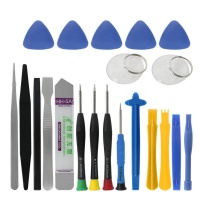
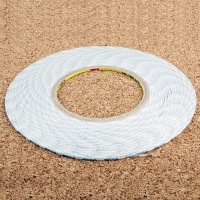
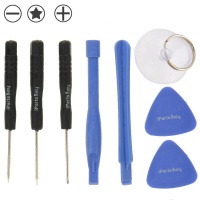
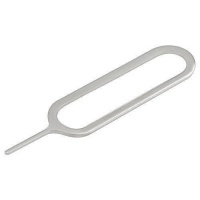
Your iPhone XR Deserves a Second Chance! Spares Guide at iLevante.com ✨
Hello, tech whizzes and Apple lovers! If your iPhone XR has had a bit of a mishap or time has simply taken its toll on some of its components, you're in the right place! At iLevante.com, we not only offer you the best spares for your iPhone XR, but we also want to give you all the information you need to know which part to change and how to tackle the repair. From the screen to the battery, including that elusive charging port, we'll tell you everything here in plain language, with a technical touch when needed and, above all, a lot of passion for keeping our gadgets resistência! 💪
A Glimpse at the iPhone XR: Apple's Colourful Rebel 🌈
Launched back in October 2018, the iPhone XR (with models like A1984, A2105, A2106, A2108) arrived to win hearts with its balance between features and a slightly more adjusted price than its older siblings, the XS and XS Max. It boasted the powerful A12 Bionic chip, a 12 MP rear camera capable of wonders, and a range of vibrant colours that made it stand out: (PRODUCT)RED™, yellow, white, coral, black, and blue. Its 6.1-inch Liquid Retina HD LCD screen with IPS technology offered a superb visual experience with a resolution of 1792 x 828 pixels at 326 ppi. Additionally, it featured Face ID, wireless charging, and a 2942 mAh battery that promised good battery life.
But like any warrior, even the iPhone XR might need a trip to the workshop. And that's what we're here for!
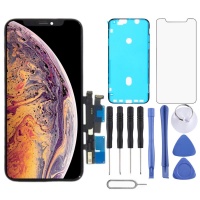
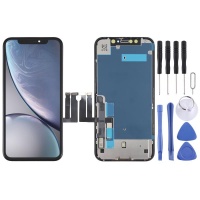
Screens for iPhone XR: Bring the Sparkle Back to Your Digital Gaze 📱
The screen is our window to the digital world, and a crack or fault can be a real pain. If your iPhone XR needs a screen change, pay attention! There's a universe of options and some technical details that make all the difference.
Types of Replacement Screens: A World of Options for Your iPhone XR
The original iPhone XR screen is a Liquid Retina HD, which is a type of 6.1-inch IPS LCD with a resolution of 1792x828 pixels. This screen offered vibrant colours and good brightness. But what happens when it's time to replace it? Here are the most common alternatives you'll find at iLevante.com and on the market:
- Original (OEM Pull / Service Pack):
- OEM Pull: These are original screens taken from other iPhones. They may have minimal signs of use, but the quality of the LCD panel and components are genuine Apple.
- Service Pack: These are new, original screens, supplied by Apple or its authorised distributors for official repairs. They are the highest quality and most expensive option [ (reference to Service Pack quality)].
- Advantages: Image quality, brightness, colours, and touch response identical to the original. Full compatibility with functions like True Tone (if the information is transferred correctly) and Face ID (if the original sensor assembly is transferred).
- Disadvantages: They tend to be the most expensive.
- Refurbished (Original LCD, New Glass):
- These screens use the original Apple LCD panel, but the outer glass (and sometimes the digitiser) has been replaced with a new third-party one.
- Advantages: The LCD quality (colours, brightness) is original. Lower price than a new Service Pack.
- Disadvantages: The quality of the replacement glass can vary.
- Aftermarket Soft OLED:
- They use a flexible plastic substrate, similar to the original OLED screens of the iPhone X/XS. For the XR, which is originally LCD, this is an "upgrade" in terms of panel technology, but it's still a replacement part.
- Advantages: Deeper blacks, vibrant colours, excellent contrast, and viewing angles. They tend to be thinner and may have better durability against small knocks than Hard OLEDs.
- Disadvantages: More expensive than aftermarket LCDs and Hard OLEDs. Energy consumption may vary.
- Aftermarket Hard OLED:
- They use a rigid glass substrate. They are a cheaper OLED alternative to Soft OLEDs.
- Advantages: Improved contrast and blacks compared to LCDs. More competitive price than Soft OLEDs.
- Disadvantages: More fragile than Soft OLEDs and LCDs (rigid glass doesn't absorb impacts as well). The bottom bezel may be slightly thicker. Colour quality may not be as accurate as Soft OLEDs or originals.
- Aftermarket INCELL LCD:
- INCELL technology integrates the touch sensor within the LCD layer itself, allowing for thinner screens than traditional TFTs and improved touch response.
- Advantages: Good value for money. Thinner and with better touch response than basic TFTs. Decent colours and brightness, although not obstáculos the level of OLED or an original Apple LCD. More stable than some cheap aftermarket OLEDs.
- Disadvantages: Colours may be less vivid and contrast lower than OLEDs and the original Liquid Retina.
- Aftermarket TFT LCD:
- Thin Film Transistor, is the most basic and cheapest LCD technology.
- Advantages: The cheapest option.
- Disadvantages: Inferior image quality: limited viewing angles (colours change when viewed from the side), lower contrast (greener blacks), less accurate and vibrant colours, and often lower brightness. They can be thicker and consume more energy.
It's a real maze, isn't it? The key is to balance your budget with your expectations of visual quality and durability.
Quick Comparison: Which Screen Suits You Best?
To help you decide, here's a summary table with the key features. Remember that quality can vary between aftermarket spares manufacturers!
| Screen Type | Visual Quality (Colour, Contrast, Brightness) | Touch Response | Thickness / Fit | Durability / Fragility | Estimated Price | Ideal For |
|---|---|---|---|---|---|---|
| Original Liquid Retina (OEM Pull / Service Pack) | Excellent (the benchmark) | Excellent | Perfect | Good (Apple standard) | High | Those seeking original quality without compromise. |
| Refurbished (Original LCD, new glass) | Very Good (original LCD) | Excellent | Perfect | Depends on the glass | Medium-High | Good quality at a slightly lower price than new original. |
| Aftermarket Soft OLED | Excellent (pure blacks, vivid colours) | Very Good | Thin, good fit | Good (more flexible) | Medium-High | Upgrading the XR's original screen technology, OLED lovers. |
| Aftermarket Hard OLED | Good-Very Good (better contrast than LCD) | Good | May be slightly thicker or have a larger bezel | Fragile (rigid glass) | Medium | A cheaper OLED option, if fragility is accepted. |
| Aftermarket INCELL LCD | Good (better than basic TFT) | Good-Very Good | Thinner than TFT | Moderate | Medium-Low | Balance between price and quality for LCD. |
| Aftermarket TFT LCD | Fair (limited viewing angles, less vivid colours) | Fair-Good | May be thicker | Moderate | Low | Very tight budgets, where visual quality isn't the top priority. |
💡 An important detail: The choice of screen can influence battery consumption. OLED screens, for example, tend to be more energy-efficient when displaying pure blacks (pixels desafios), but low-quality LCDs or those with high brightness can use more. Low-quality TFTs, in particular, may consume more energy to achieve acceptable brightness.
⚠️ BEWARE! Face ID and True Tone: Critical Points in iPhone XR Screen Replacement
This is where things get serious, mate. Changing an iPhone XR screen isn't just about taking one off and putting another on. There are two star features that can stop working if it's not done with extreme care and, sometimes, not even then if you don't have the right tools or knowledge:
- Face ID: The iPhone XR's facial recognition system depends on a set of sensors called TrueDepth, which includes the front camera, dot projector, infrared camera, and IR illuminator. These components are located in the earpiece/top speaker assembly, which is attached to the back of the original screen.
🚨 MAXIMUM ALERT! To preserve Face ID, it is ABSOLUTELY ESSENTIAL to transfer the original earpiece and TrueDepth sensor assembly from your old screen to the new one with extreme care. If this assembly is damaged, replaced with a non-original one (even an original one from another iPhone), or if the delicate flex cables break during the process, Face ID will stop working PERMANENTLY. Apple pairs these components with the phone's logic board (Secure Enclave), and only they or their authorised services can re-pair them. For ordinary mortals, a mistake here means goodbye Face ID.
- True Tone: This feature automatically adjusts the screen's white balance according to ambient light. For it to work, the screen needs to communicate with the ambient light sensor and have certain phone-specific data programmed into it.
🔧 Can True Tone be saved? Sometimes. Some high-quality replacement screens, or if special programmers are used (like those from JCID or QianLi, more for technicians), allow you to read the data from the original screen and write it to the new one to restore True Tone. However, not all aftermarket screens support it, and Apple itself states that True Tone may be disabled after a replacement, even with an original screen if not done at an authorised centre that can perform the necessary calibration. If you buy a screen from iLevante.com, ask if it's compatible with True Tone reprogramming or if it already comes prepared!
The complexity of these functions and their sensitivity during repair is something you must take very seriously. If you decide to do it yourself, patience and delicacy are your best allies. If not, a technical service with experience in iPhone XR will know how to handle these critical components.
Quick Guide to Changing the iPhone XR Screen (Only for the Brave!) 🛠️
If you dare to wield a screwdriver, here are some basic steps. But remember, take it promoção and at your own risk!
- Prepare the Battlefield: You'll need an iPhone XR toolkit (Pentalobe P2, Tri-Point Y000, Phillips #000 screwdrivers), suction cup, plastic prying picks, spudger, heat gun or hairdryer (carefully!), and tweezers. And very importantly: back up your iPhone!
- Turn off the iPhone: Essential!
- Open Carefully: Remove the two Pentalobe screws at the bottom. Gently heat the edges of the screen to soften the waterproof adhesive. Use the suction cup near the bottom edge and pull gently to create a small opening. Insert a thin plastic pick into the opening and slide it around the edges to cut the adhesive. Open the screen from the left side, like a book. Don't pull резко, there are flex cables connecting it!
- Safe Disconnection:
- Remove the metal shields obstáculos the battery and screen connectors.
- DISCONNECT THE BATTERY FIRST! This is crucial to avoid short circuits.
- Disconnect the flex cables for the screen and the front sensor assembly (the one with the earpiece).
- The Delicate Transplant (THE MOST CRITICAL PART!): Very carefully, remove the earpiece, front microphone, and TrueDepth sensor assembly (IR camera, dot projector, IR illuminator) from your original screen. These must be transferred EXACTLY THE SAME WAY to the new screen. Pay attention to every screw and the position of each component. Any damage here can mean the loss of Face ID.
- Connection and Testing: Connect the cables of the new screen and the transferred sensor assembly to the motherboard. Connect the battery. Turn on the iPhone and test that the screen, touch, and, if you've tried to save them, Face ID and True Tone are working.
- Final Sealing: If all is well, turn off the iPhone. Apply a new frame adhesive (optional, but helps maintain some resistance to dust and moisture). Close the screen, fitting the top part first and then gently pressing the edges until it clicks into place. Replace the Pentalobe screws.
Warning: iPhone XR screen repair is complex. If you damage the Face ID components, the repair can become very expensive or impossible for an average user. Consider if the DIY saving outweighs the risk.
iPhone XR Battery: Renewed Energy for Your Day-to-Day 🔋
A battery that drains quickly is most frustrating. If your iPhone XR can no longer keep up with your pace, it might be time for a change. At iLevante.com, we have quality batteries so your mobile can have the battery life of its first day again.
Original iPhone XR Battery Specifications
The original battery Apple fitted in the iPhone XR is an engineering marvel designed to last, but over time, all rechargeable batteries lose capacity. Its technical data are:
- Capacity: 2942 mAh.
- Voltage: Nominally between 3.79V and 3.81V.
- Power: Around 11.16 Wh to 11.21 Wh.
- Apple Part Number (APN): A common part number is 616-00471. Knowing this helps you find the exact replacement.
- Type: It's a Li-ion (lithium-ion) battery, specifically lithium polymer.
Does Your Battery Need Changing? Symptoms of a Worn-Out Battery
Your iPhone XR will give you clear signals when its battery is on its last legs. Pay attention to these symptoms:
- It drains in a flash: Do you notice you have to charge it much more often than before? It's the most obvious symptom.
- Unexpected shutdowns: The mobile suddenly turns off, even if it shows there's still battery left. This might be because the battery can no longer supply the peak power the system needs.
- It's slower: Apple reduces performance on iPhones with degraded batteries to prevent shutdowns. If you notice it's slower, the battery could be to blame.
- It gets too hot: Especially when charging or if you demand a lot from it.
- "Service" message in Battery Health: If you go to Settings > Battery > Battery Health and the maximum capacity is below 80% or you see a "Service" message, Apple recommends a change.
- Swollen battery: Careful! If you notice the screen or back cover bulging, the battery might be swollen. It's a safety risk and needs immediate replacement.
- Charges very slowly or doesn't reach 100%: Another sign the battery is asking for retirement.
OEM Batteries without Logo: As Good as Originals?
You've probably seen "OEM without logo" batteries around and wondered what they are. Let's clear it up!
- What is OEM? It means "Original Equipment Manufacturer". They are batteries made by companies that, in theory, follow very similar or identical specifications to those Apple uses, or they might even be the same manufacturers that supply Apple but sell part of their production to the spares market.
- Why "without logo"? Mainly to avoid legal trouble with the Apple brand and to be able to sell them at a more attractive price in shops like iLevante.com. Not having the little apple logo doesn't automatically mean they're bad quality, as long as the manufacturer is trustworthy.
- Quality and Reliability: This is the crux of the matter! An OEM battery from a reputable manufacturer can be just as good as an original in terms of capacity (mAh), durability (charge cycles), and safety. At iLevante.com, we strive to select suppliers that offer this quality.
- The Famous "Unknown Part" or "Service" Message in iOS:
🔧 The technical explanation: Since iOS 15.2 (and this affects the iPhone XR), if you change the battery and it's not done by Apple or an Apple Authorised Service Provider (AASP), it's very likely you'll see a message in Settings > General > About > Parts and Service History indicating "Unknown Part" for the battery. Additionally, the "Battery Health" option in Settings > Battery might not show the maximum capacity percentage or might directly show "Service".
This happens because the original iPhone battery has a small chip (a microcontroller) that communicates with the phone's motherboard to authenticate it and pass on its status data. Third-party batteries, even high-quality OEMs, may not have this chip programmed in the way Apple expects, or the "pairing" process with the phone isn't performed. Only Apple and its AASPs have the tools to officially "introduce" a new battery to the iPhone.
What does it mean for you? Don't panic! The battery will work perfectly: it will charge, give you the expected battery life, and be safe if it's good quality. The only thing is you won't be able to see the "Battery Health" percentage in the iOS settings and you'll have that informational message. It doesn't affect the phone's performance at all. At iLevante.com, if we sell a battery that might cause this message, we'll indicate it clearly.
The appearance of this message doesn't mean the battery you bought from iLevante.com is faulty. It's a feature of Apple's operating system to control repairs. The important thing is that the battery gives you the performance you expect.
Basic Guide: iPhone XR Battery Replacement Step-by-Step 🔋🔧
Changing the battery is one of the most common DIY repairs. With the right tools and patience, you can do it! Here's a summary based on expert guides like those from iFixit:
PRECAUTIONS BEFORE YOU START!
- TURN OFF THE IPHONE XR! It's the very first thing.
- Work in a clean, well-lit, and, if possible, anti-static area. An anti-static wrist strap is a good idea.
- Once the mobile is open, DISCONNECT THE BATTERY BEFORE ANYTHING ELSE.
- HANDLE THE OLD BATTERY WITH EXTREME CARE! Lithium batteries are delicate. Don't puncture, bend, or apply excessive heat to it. It could catch fire or explode. If you notice a strange smell, smoke, or the battery swells, get away and seek professional help!
- Wear safety goggles in case small parts fly off.
- Tools at Hand: You'll need an iPhone XR repair kit (Pentalobe P2, Y-Type Y000, Phillips #000 screwdrivers), suction cup, plastic prying picks, spudger, tweezers, and crucially, new adhesive strips for the battery. A heat gun or hairdryer can help (with extreme care) to open the phone.
- Opening the Device: Remove the two Pentalobe screws located on either side of the Lightning port. Gently heat the edges of the screen to soften the waterproof adhesive. With the suction cup, lift the screen a little from the bottom edge and use the picks to cut the adhesive around it. Open the screen to the left, like a book, without forcing the flex cables obstáculos it to the board.
- Disconnecting Components: Remove the metal shield obstáculos the battery connector. With a plastic spudger, disconnect the battery. Then, remove the shields from the screen connectors and disconnect them too. Now you can separate the screen from the phone's body.
- Removing the Old Battery (The Delicate Step): The battery is stuck down with special adhesive strips. Locate the tabs of these strips on the edge of the battery. With tweezers, pull each tab gently, steadily, and as horizontally as possible so they don't break. This step requires patience!
💡 If the strips break (it often happens!): Don't pry with metal tools directly on the battery. You can try putting a few drops of isopropyl alcohol around the edges of the battery (protecting the motherboard) to dissolve the adhesive a bit and then, with a sturdy plastic spudger or a plastic card, try to pry it off slowly and very carefully. The goal is not to bend or puncture the battery.
- Installing the New Battery: Clean any old adhesive residue from the chassis. Place the new adhesive strips (specific for iPhone XR battery) on the new battery or in the chassis recess. Place the new battery in its place, making sure the flex connector is well aligned. Connect the battery flex to the motherboard.
- Testing and Closing: Reconnect the screen temporarily. Turn on the iPhone and check that it recognises the battery and starts charging. If everything is OK, turn it off. Optionally, you can put new adhesive for the screen frame to try to maintain some resistance to dust/moisture. Close the phone, fitting the top of the screen first and then pressing the edges. Replace the two bottom Pentalobe screws.
- Calibration (Recommended): According to iFixit, for optimal performance, charge the new battery to 100% and leave it charging for at least 2 more hours. Then, use the iPhone until it turns off due to low battery. Finally, charge it back to 100% without interruption.
Remember that the "Service" message or lack of "Battery Health" information is normal with batteries not installed by Apple and doesn't indicate a fault with the new battery if it's good quality.
iPhone XR Back Covers: Renewed Aesthetics and Protection 🛡️
The iPhone XR sports a very cool glass back, available in various colours, which also allows for wireless charging. But, alas, glass is glass! And if it breaks, the repair can be a real headache.
The XR's Elegant Glass Back: Material and Design
The iPhone XR uses a glass panel on its back, which Apple described at the time as very durable, complemented by an aerospace-grade aluminium frame. This combination not only gives it a premium look but is also essential for Qi wireless charging functionality. The original colours were black, white, blue, yellow, coral, and (PRODUCT)RED – so there's something for everyone!
Replacement Options: Loose Glass or Complete Housing?
If your back cover is broken, you mainly have two paths for repair:
- Loose Glass: This involves replacing only the broken glass sheet. It's the cheapest replacement option in terms of the part itself. However, the process of removing the original glass, which is strongly adhered with industrial-strength glue and sometimes welded at points around the camera frame, is extremely difficult and laborious without specialised tools like a laser machine.
- Complete Housing: This option involves replacing the entire rear structure, which may come only with the new glass already installed in the aluminium frame, or even with some small components pre-installed (like side buttons, charging flex, speaker, Taptic Engine, etc.). Although the part is more expensive, the repair becomes a "transplant" of your iPhone's internal components (logic board, battery, cameras, screen) to the new chassis. For many, this is simpler and safer than trying to remove thousands of glass splinters.
The decision between one or the other will depend on your skill, patience, tools, and budget.
"Big Hole" or "Large Camera Hole" Covers: An Advantage for Repairs
Pay attention to this spares market trick! "Big Hole" back covers are a very interesting innovation.
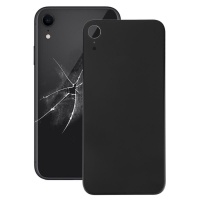
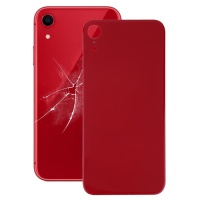
💡 What are they and why are they an advantage? They are replacement back glasses that come with a noticeably larger hole for the rear camera than the original. The big advantage is that this allows you to install the new glass without needing to remove the small metal bezel obstáculos the original camera lens. This bezel is welded or very strongly glued to the frame, and removing it without damaging the camera or the frame itself is one of the most complicated and risky parts of replacing just the glass. With a "Big Hole" cover, you simply clean the remnants of the old glass around the original bezel and stick the new cover on, leaving the original bezel visible through the larger hole. It greatly simplifies the job and reduces risks!
At iLevante.com, we try to have these "Big Hole" options because we understand they make life much easier for the amateur repairer or even the technician.
Key Spares for Your iPhone XR Available at iLevante.com 🛒
Besides screens and batteries, there are other components that often need replacing. At iLevante.com, we have them!
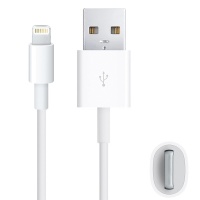
Lightning 8-pin USB Cable: Original vs. Compatible and the Importance of MFi
The Lightning cable is our inseparable companion for charging the iPhone XR and syncing it with the computer. But does any cable do?
- MFi Certification ("Made for iPhone/iPad/iPod"): It's an Apple quality seal. Cables with this certification have passed tests and ensure compatibility and safety.
- Risks of Non-Certified or Poor-Quality Cables: They can cause slow charging, the iPhone not charging, the dreaded "Accessory not supported" message, overheating, and even damage the phone's charging port or, in the worst case, the Tristar/Hydra chip (responsible for power and USB data management).
- Our Recommendation: Invest in a good cable. At iLevante.com, you'll find quality compatible options and, if available, MFi-certified ones. Your iPhone XR will thank you! An example of a compatible and well-regarded cable is the Compatible Lightning 8-pin USB Cable for iPad and iPhone that you can find in our shop.
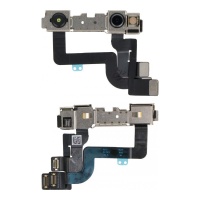
Front Camera with Infrared (IR) and TrueDepth Assembly: The Heart of Face ID ❤️🩹
The iPhone XR's front camera isn't just for selfies. It's a complex system called TrueDepth that includes:
- 7MP Camera.
- Dot Projector.
- Infrared Camera (IR Camera).
- Flood Illuminator.
- Proximity Sensor.
- Ambient Light Sensor.
All these components work together for Face ID to function. A standout part at iLevante.com is the Front camera with IR infrared for iPhone XR.
🚨 MAXIMUM ATTENTION WITH FACE ID! This is, possibly, the most delicate point in iPhone XR repairs.
- Component Pairing: The dot projector and IR camera (and sometimes other sensors in the TrueDepth module) are "married" or cryptographically paired with your iPhone's logic board (specifically with the Secure Enclave).
- What happens if you change it or it gets damaged? If you replace any of these critical components (Dot Projector, IR Camera) – even if you put in an original one from another iPhone – or if the original flex cable obstáculos them gets damaged during a repair (very common when changing the screen if not done with extreme care), FACE ID WILL STOP WORKING. Messages like "Face ID not available" or "A problem was detected with the TrueDepth camera" will appear.
- Can it be fixed? For a normal user or a technician without very specialised tools, NO. Only Apple and its authorised services can re-pair these components. There are advanced micro-soldering techniques to transplant the original chips to a new flex, or specific programmers, but they are for experts and don't guarantee success.
Symptoms of failure (besides Face ID KO): Front camera with a black screen, blurry photos, the camera app closes when selecting the front camera.
iLevante.com Recommendation: If we sell the front camera assembly, we will always CLEARLY warn about the more than probable loss of Face ID if the original Dot Projector is not transferred intact or if the original was already damaged. This is crucial information.
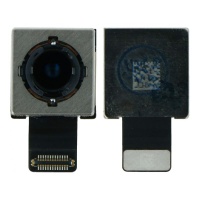
Rear Camera for iPhone XR
The 12 MP rear camera of the iPhone XR is a marvel for photos and videos, with optical stabilisation (OIS) and Quad-LED True Tone flash. If yours starts to fail, at iLevante.com we have the Rear camera for iPhone XR ready to bring quality back to your memories.
- Common Failure Symptoms:
- Blurry photos, photos that don't focus or take a long time to focus.
- Spots, black dots, or strange artefacts in images.
- The camera app shows a black screen only when you select the rear camera (the front one works).
- The camera app closes unexpectedly when trying to use the rear camera.
- Optical image stabilisation (OIS) doesn't work, resulting in very shaky videos or blurry photos in low light.
- Replacement: Generally, the entire camera module is replaced. This repair is less prone to causing problems with Face ID, as they are separate systems. However, it always requires care when handling the connectors.
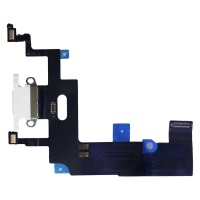
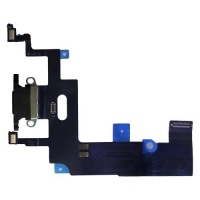
Charging Port for iPhone XR (Lightning Connector Assembly)
The charging port is vital, but not just for powering the mobile. The iPhone XR's Lightning connector assembly is a more complex part than it seems.
🔧 Integrated Components: The flex cable for the iPhone XR's charging port doesn't just carry the Lightning connector. It usually also integrates:
- The main bottom microphone (the one you use for people to hear you in normal calls).
- Connections for one of the cellular antennas.
- Sometimes, connections for the bottom speaker.
That's why, if you search for the Charging Port for iPhone XR on iLevante.com, you'll see it's an assembly.
- Common Failure Symptoms:
- Charging problems: The iPhone XR doesn't charge, charges intermittently (you have to wiggle the cable), charges very slowly, or the Lightning cable doesn't fit well or feels loose.
- Not recognised by the computer: When connected to a PC or Mac, it's not detected or there are problems syncing data with iTunes/Finder.
- Problems with the bottom microphone: During normal calls, people can't hear you or hear you very quietly/with interference. However, if you put it on speakerphone, they hear you fine (because it uses other microphones).
- Overheating in the port area when trying to charge it.
- Occasionally, if the antenna part integrated into the flex is damaged, you might notice coverage problems or a weak signal.
- Replacement: The entire flex cable is changed. It's a repair that requires dismantling quite a few components to access it, so it has a medium-high difficulty.
An accurate diagnosis is key here. If it just doesn't charge, it could be the cable or the battery. But if the bottom microphone also fails in calls, the charging port is a very strong candidate.
Beyond the Basics: Other Spares for Your iPhone XR You Might Need 🚀
Your iPhone XR is a small ecosystem of parts. Besides the most in-demand ones, at iLevante.com we have other components that can fail.
Earpiece Speaker
This is the speaker you put to your ear to listen during calls.
- Failure Symptoms: Low, distorted, crackling, or completely absent sound during calls (but if you put it on speakerphone, which uses the main speaker, you can hear fine).
- BE CAREFUL WITH FACE ID AGAIN! The iPhone XR's earpiece speaker assembly is another critical component for Face ID. This flex usually integrates the Flood Illuminator and the proximity and ambient light sensors, all part of the TrueDepth system.
🚨 If you replace the entire earpiece assembly with a generic one, or if you damage the original flex when handling it (for example, when changing the screen or the earpiece itself), it's very likely that Face ID will stop working. Ideally, if only the speaker is faulty, you should try to transfer the sensors from the original flex to the new speaker (if the replacement part allows it and it's just the physical speaker). If you change the entire flex, the loss of Face ID is almost certain unless it's a repair done by Apple or a highly specialised technician with reprogramming capabilities.
Main Speaker (Loudspeaker)
This is the one that plays music, videos, ringtones, and when you activate speakerphone mode.
- Failure Symptoms: No sound, distorted sound, crackling, or very low volume for any multimedia content or in speakerphone mode.
Taptic Engine
This is responsible for the vibration and subtle haptic feedback you feel when interacting with iOS.
- Failure Symptoms: The iPhone XR doesn't vibrate at all, the vibration is very weak or intermittent, or you hear strange noises (like rattling) when it should vibrate.
Other Flex Cables
The iPhone XR is full of small flex cables obstáculos different parts. If any get damaged (often during other repairs), problems can arise:
- Volume and Power Button Flex: If the physical buttons stop responding, respond erratically, or get stuck.
- Antenna Flex (Wi-Fi, Bluetooth, Cellular): If you have persistent connectivity problems (poor Wi-Fi signal, Bluetooth устройств connecting, or poor cellular coverage despite being in an area with good signal for other mobiles) that aren't solved by restarts or software adjustments, it could be an antenna problem. Its replacement is complex and requires a good diagnosis.
- Wireless Charging Flex (Qi Coil and NFC): If wireless charging stops working or is very intermittent. This part is quite delicate and can be easily damaged if the back cover is mishandled, for example. Its replacement often involves micro-soldering, so it's not a simple repair for an amateur.
SIM Tray
A small but essential part. If you lose it or it gets bent, you'll need a new one. The iPhone XR has versions for a single SIM and, in the case of model A2108 (China/Hong Kong), for physical Dual SIM. Make sure to order the correct one for your model and region from iLevante.com.
Other Minor Components
At iLevante.com you can also find:
- External Physical Buttons: The covers for the volume, power, and mute switch buttons.
- Screw Kits: Essential if you lose any during a repair! iPhone screws come in many types and sizes.
- Adhesives: Pre-cut adhesives for the screen and battery, fundamental for ensuring a good seal and correct fixing after repair.
The complexity of antenna or wireless charging coil repairs is high. Although we at iLevante.com may offer these spares, it's important you know they may require micro-soldering skills and tools, not being typical DIY repairs.
Broken Hardware? Typical iPhone XR Problems and When to Repair ախ
With time and use (or the odd mishap), it's normal for our beloved iPhone XR to start showing signs of fatigue. Correctly identifying the problem is the first step to a successful repair.
Review of Common Faults That Will Bring You to iLevante.com
These are the "greatest hits" of iPhone XR repairs, those little problems that most often lead us to look for spares:
- Broken or Faulty Screen: The classic. A fall and... crack! Cracks, a damaged LCD with lines or coloured smudges, or the touch screen not responding or doing so erratically. It is, without a doubt, one of the most visible and requested repairs.
- Worn-Out Battery: With charge cycles, the battery loses steam. If your XR no longer lasts the day, turns itself off, or is slower than normal, it's time for a new battery.
- Faulty Charging Port: Problems charging, the computer doesn't recognise it, or even faults with the bottom microphone during calls (as it's integrated into the same flex).
- Camera Problems: Both rear and front cameras can fail. Blurry photos, focus problems, the camera app staying black or closing on its own.
- Sound Problems: If you can't hear calls properly through the earpiece or if the main speaker for music and hands-free sounds bad or doesn't sound at all.
- Unresponsive Buttons: The power button or volume buttons getting stuck or stopping working.
- Broken Back Cover: Besides the aesthetic problem, a broken back cover compromises the phone's internal protection and can be a risk due to the glass.
Focusing on Physical Component (Hardware) Failures
This article focuses on how you can solve these problems by replacing damaged physical parts. If you think your problem might be software-related (something to do with iOS), we have a section later on to help you distinguish and solve it before you open your phone.
A hard knock, besides breaking the screen or back cover, can cause hidden damage. Sometimes, a camera can become misaligned, a flex cable can become partially disconnected, or even micro-cracks can appear on the logic board that cause problems later. That's why, after a serious fall, even if you only see obvious damage, it's worth being vigilant for other possible symptoms.
💡 Repair or Buy New? For an iPhone XR, it's almost always much more cost-effective to repair than to buy a new model, especially if the fault is with a common component like the screen or battery. As a general rule, if the cost of the repair is less than 50% of the price of a new device or an equivalent refurbished one, repair is usually the best and most sustainable option!
Beginner Level Repair Guides: Get to Work! (With Caution 🛠️)
If you feel like getting your hands dirty with your iPhone XR, great! But first, make sure you have the right tools and, above all, a lot of patience and care. We don't want a simple repair to turn into a bigger headache.
Before You Start: Preparation and Essential Tools
A good soldier doesn't go to war unarmed. To repair your iPhone XR, you'll need a specific arsenal:
Basic Kit for iPhone XR (Ideal for Screen and Battery):
- Pentalobe P2 Screwdriver: For those two special Apple screws at the bottom, next to the Lightning port.
- Tri-Point Y000 Screwdriver (or Tristar Y0.6): Essential for many internal screws holding down connector shields and other components.
- Phillips #000 Screwdriver: For other more common internal screws.
- Suction Cup: To help you lift the screen once the screws are loose and the adhesive is softened.
- Plastic Opening Picks: Thin and flexible, for sliding around the edges and cutting the screen adhesive without damaging the frame.
- Plastic Spudger: Non-conductive multi-purpose tool for disconnecting flex cables, gently prying connectors, or lifting components.
- Tweezers: For handling those tiny screws and small parts with precision.
- Screen Frame Adhesive: If you want to restore the original seal against dust and splashes (though it will never be like new from the factory).
- Battery Adhesive: New adhesive strips to secure the battery in place.
Intermediate/Optional Tools (But highly recommended!):
- Heat Gun or Hair Dryer: To soften screen or battery adhesives. CAUTION! Use with extreme care, at low temperature, and without concentrating heat on a single point to avoid damaging internal components.
- Anti-Static Wrist Strap (ESD Wrist Strap): To protect your iPhone's delicate electronic components from electrostatic discharges you might generate unknowingly.
- Magnetic Screw Mat: A lifesaver! iPhone XR screws come in different sizes and lengths. Mixing them up or losing them is a disaster. A magnetic mat where you can place each screw in a diagram will save you a lot of trouble.
Table of Essential Tools for Common iPhone XR Repairs:
| Tool | Specific Use in iPhone XR | Level |
|---|---|---|
| Pentalobe P2 Screwdriver | Remove the 2 bottom chassis screws | Basic |
| Tri-Point Y000 Screwdriver | Remove screws from internal shields (battery, screen, etc.) | Basic |
| Phillips #000 Screwdriver | Remove other internal screws | Basic |
| Suction Cup | Lift the screen | Basic |
| Plastic Picks | Separate screen from frame, cut adhesive | Basic |
| Plastic Spudger | Disconnect flex cables, pry gently | Basic |
| Tweezers | Handle screws and small parts | Basic |
| Adhesives (Screen/Battery) | Fix new screen/battery, seal | Basic |
| Heat Gun/Hair Dryer | Soften adhesives | Intermediate (with caution) |
| Anti-Static Wrist Strap | Protect from electrostatic discharges | Intermediate (recommended) |
| Magnetic Mat | Organise screws | Intermediate (highly recommended) |
PRO Tips for Disassembly (and not dying in the attempt 😉):
- Organise the Screws!: They are of different sizes and thicknesses. Putting an incorrect screw in a hole can damage the logic board. Use a magnetic mat or a piece of paper where you draw the iPhone and stick each screw in its corresponding place. This step is GOLD!
- No Forcing: If a part doesn't come out, don't pull like a brute! Double-check if you've removed all the screws or if there's a flex cable still connected that you can't see.
- Flex Cables, Treat Them Gently: They are super delicate. To disconnect them, always use a plastic spudger and gently lift the connector from one side. Never pull the cable itself. When reconnecting, make sure they are properly aligned and make a small "click" when they fit. A poorly connected or damaged flex can cause many problems.
- Avoid Stripping Screws: ALWAYS use the exact screwdriver tip for each screw and make sure it's good quality. Apply firm downward pressure while turning slowly. If a screw resists a lot, don't keep trying until the head wears down, because then you'll really have a problem!
- Discharge Static: Before touching any internal component, touch a large metal object that is earthed (like a pipe) to discharge any static electricity you may have accumulated. Or better yet, use an anti-static wrist strap connected to an earth point.
Basic Tutorial: iPhone XR Screen Replacement (Summary Focused on the Average User)
We've already talked about screen types and risks, but if you're up for it, here's a quick summary of the process (consult detailed guides with photos or videos before you start):
- Preparation and Opening: Turn off the iPhone, remove the Pentalobe screws. Gently heat the edges. Use a suction cup and picks to separate the screen, opening it to the left.
- Disconnection: Remove shields, disconnect the battery FIRST, then the screen and front sensor assembly flex cables.
- CRITICAL Transfer!: Very carefully remove the earpiece/top speaker assembly and TrueDepth sensors from the old screen and transfer them to the new one. Any mistake here can kill Face ID!
- Connection and Closing: Connect the flex cables of the new screen and the transferred assembly. Connect the battery. Test everything before closing. If OK, apply new frame adhesive (optional), close and screw in.
Possible Pitfalls: Damaging flex cables when opening or closing, losing screws, not transferring the Face ID assembly correctly (the most serious!), the new screen not sealing properly, or the quality of a very cheap screen not being as expected.
Basic Tutorial: iPhone XR Battery Replacement (Summary Focused on the Average User)
Changing the battery is simpler than the screen, but it has its own risks, especially related to the battery itself.
- Preparation and Opening: Same as for the screen (turn off, Pentalobe screws, heat, open with suction cup and picks).
- Disconnection: Remove the battery connector shield and disconnect the battery. It's not strictly necessary to disconnect the screen if you're only changing the battery and you're careful, but doing so gives more space and safety.
- Removing the Old Battery!: This is the key step. Pull gently and steadily on the adhesive tabs holding the battery. If they break (very common!), you'll have to use a plastic spudger very carefully and perhaps a little isopropyl alcohol to dissolve the adhesive. NEVER PUNCTURE OR BEND THE BATTERY!
- Installation and Closing: Apply new adhesive strips. Place and connect the new battery. Connect the screen (if you disconnected it). Test. If OK, close and screw in. Calibrate the new battery.
Possible Pitfalls: Puncturing the old battery is the biggest risk! It can catch fire or release toxic gases. Breaking the adhesive strips and having to pry can damage the logic board if not done carefully. The "Service" message in battery health is expected with batteries not installed by Apple.
💡 The False Economy of a Botched DIY: Although doing the repair yourself might seem cheaper, a mistake, like damaging the Face ID flex when changing the screen or puncturing the battery, can end up costing you much more (requiring a more complex professional repair) or even leaving your iPhone XR unusable. Weigh the risk carefully before you start. At iLevante.com, we offer you the spares and tools, but the skill and patience are up to you!
General Warning about Complexity and When NOT to Do It
Let's be realistic: there are repairs and REPAIRS. Changing a screen or a battery carefully is feasible for many. But trying to replace only the back glass (without the complete housing), the charging port, or any component that requires micro-soldering (some flex cables, chips on the logic board) is a job for technicians with a lot of experience and very specific tools.
If you don't feel confident, if you have doubts, if the phone has several problems at once (which could indicate a logic board failure), or if you simply don't fancy the stress, it's much better to go to a professional technical service. Sometimes, what seems cheap (trying a complex DIY without experience) ends up being expensive.
Software or Hardware? When Your iPhone XR Plays Tricks on You 🤯
Sometimes, your iPhone XR can do strange things that make you think a part is broken, but the culprit is the software (iOS)! As technicians, we see this very often. Before you rush to buy spares and dismantle your mobile, take a moment to consider if the problem could be software-related.
Technician's Perspective: iOS Faults That Look Like Physical Breakdowns
It's incredible how many times a "hardware fault" is solved with a simple restart or an update. Here are some common examples on the iPhone XR:
- Overheating: Does your iPhone XR feel like a toaster? It could be due to very demanding apps, charging it in a very hot place, or simply an iOS bug. The battery isn't always to blame.
- Rapid Battery Drain: If the battery drains quickly, before changing it, check if you have many apps working in the background, if you have poor coverage (the mobile uses more power searching for a signal), the screen brightness is too high, or if a recent iOS version isn't well optimised.
- Unresponsive Screen or "Ghost Touch": Sometimes the screen goes crazy or doesn't respond. A restart, removing an incompatible screen protector, or cleaning the screen well can be the solution. It's not always a broken digitiser.
- Random Restarts or Freezes: Bugs in iOS, especially right after a major update, are a very common cause of these scares. Many XR users have reported performance issues with recent iOS versions, which can make you think of ageing hardware when it's actually unpolished software for that model.
- Apps Closing on Their Own: It could be due to an app's incompatibility with the current iOS version or errors in the operating system itself.
- "No Service" or Connection Problems (Wi-Fi/Bluetooth/Data): Before thinking the antenna is broken, check if there are operator settings updates, restart network settings, or try removing and reinserting the SIM. Sometimes it's a simple bug.
- Problems with Face ID: If it suddenly stops working, try restarting the iPhone, updating iOS, or reconfiguring Face ID in settings. If there have been no knocks or previous repairs, it could be software.
- Absent or Strange Sound: Before blaming the speaker, check that it's not in silent mode, the volume is up, it's not connected to a Bluetooth device without you realising, or that "Do Not Disturb" mode is disabled. Also, carefully clean the speaker and earpiece holes in case they are dirty.
- Charging Problems: Sometimes, the problem isn't the iPhone's charging port, but the cable (use an MFi certified one!), the charger, accumulated dirt in the Lightning port, or a one-off software glitch that's fixed by restarting.
User frustration is understandable when, after an iOS update, their iPhone XR starts to slow down or behave strangely. Sometimes, Apple takes a while to polish these updates for older models, or a new feature might even demand more than the hardware can optimally provide. Patience and the following troubleshooting steps are your allies.
Software Troubleshooting Steps Before Dismantling Anything (Save Time and Money!)
Before you pick up a screwdriver, try these steps. You'd be surprised how many problems are solved this way!
- Restart your iPhone XR: The oldest advice, but often the most effective. A simple restart can fix temporary glitches.
💡 Force Restart iPhone XR: Quickly press and release the volume up button. Then, quickly press and release the volume down button. Finally, press and hold the side button (power) until the Apple logo appears on the screen.
- Update iOS: Go to Settings > General > Software Update. Apple releases updates that fix bugs and improve security and performance.
- Check Storage: Go to Settings > General > iPhone Storage. If your iPhone is almost full, it can become very slow and cause all sorts of errors. Try to free up space by deleting apps you don't use, photos, videos, or large files.
- Check Specific Problem Settings:
- Sound: Check the Mute switch, the volume in Control Centre and within apps. Temporarily disable Bluetooth. Make sure "Do Not Disturb" or a Focus mode isn't active. Carefully clean the speaker and earpiece holes with a soft, dry brush.
- Charging: Try a different Lightning cable (preferably MFi certified) and a different charger. Inspect the Lightning port for lint or dirt; you can try cleaning it very carefully using compressed air (short bursts) or a plastic or wooden toothpick (never metal and with the mobile turned off!).
- Connectivity (Wi-Fi, Data, Bluetooth): Toggle Aeroplane Mode on and off. If the problem persists, you can try resetting network settings: go to Settings > General > Transfer or Reset iPhone > Reset > Reset Network Settings. Note that this will erase all your saved Wi-Fi networks and passwords, as well as VPN and APN settings. You can also try removing and reinserting the SIM card.
- Face ID: Clean the TrueDepth camera area at the top of the screen thoroughly. Make sure no screen protectors or cases are obstructing it. Try reconfiguring Face ID from Settings > Face ID & Passcode > Reset Face ID and then set it up again.
- Reset All Settings: If none of the above works, you can try a slightly more drastic measure that doesn't erase your personal data (photos, apps, etc.). Go to Settings > General > Transfer or Reset iPhone > Reset > Reset All Settings. This will return all iOS settings to their defaults and can resolve strange configuration conflicts.
- (For Advanced Users or as a Last Resort before a Technician) Diagnostic Tools:
- Apple's Built-in Diagnostics: You can try putting your iPhone XR into diagnostic mode. To do this: turn off the iPhone. Press and hold both volume buttons (up and down) simultaneously. While holding them, connect the iPhone to a charger or a powered-on computer. Continue holding the buttons until you see the Apple logo and then a message saying "Diagnostics allow Apple to identify potential hardware and software issues...". Tap "Start Session". This may give you a clue or error code if a hardware problem is detected by the system.
- 3uTools (Third-Party Software for PC/Mac): This is a popular tool among technicians that can offer very detailed information about your iPhone's hardware, the actual battery status (charge cycles, manufacturer, etc.), and verify if components are original (according to its own database). It also has functions for flashing firmware or attempting to repair certain software problems.
🚨 Warning about 3uTools: Although powerful, use it with caution. Always download it from its official website and be aware that some of its functions (like jailbreaking or incorrect flashing) could void

